Saturday, April 4, 2015

ISRF Bulletin 6: Power.

Now you can read Words and Numbers in ISRF Bulletin 6:  Power, on ISSUU. You'll find the comic on page 12 with a short introduction by Rachael Kiddey.


Tuesday, February 24, 2015

Words & Numbers.


I have almost completed a new project called Words & Numbers. It's a collaboration with archaelogist Rachael Kiddey. Rachael got in touch with me to look into the possibility of using graphic storytelling in a bulletin published by ISRF, the Independent Social Research Foundation.
She had noticed how graphic storytelling in an academic context can be put to use in Places People Stories, a conference publication in the form of a comic book by myself and Petter Hanberger for the Linnaeus University. After some discussion we decided to work together, Rachael writing a script and me drawing. It worked very well I think.
I will post more on this after the bulletin is published.

Thanks Lars!

26 of June the project is finished. Thanks Lars for all the help, I couldn't have done it by myself this time.

Done!

 Everything in place.

The figure is painted with a polyurethane paint suited for industrial use. Inside it's treated with rust-proof for automobile use.

Installation in Myresjö.

 All set to go to Myresjö in late June -14

Almost done. We placed the stars on a layer of gravel with some help from the kids at the day care center.

Building a space traveler.
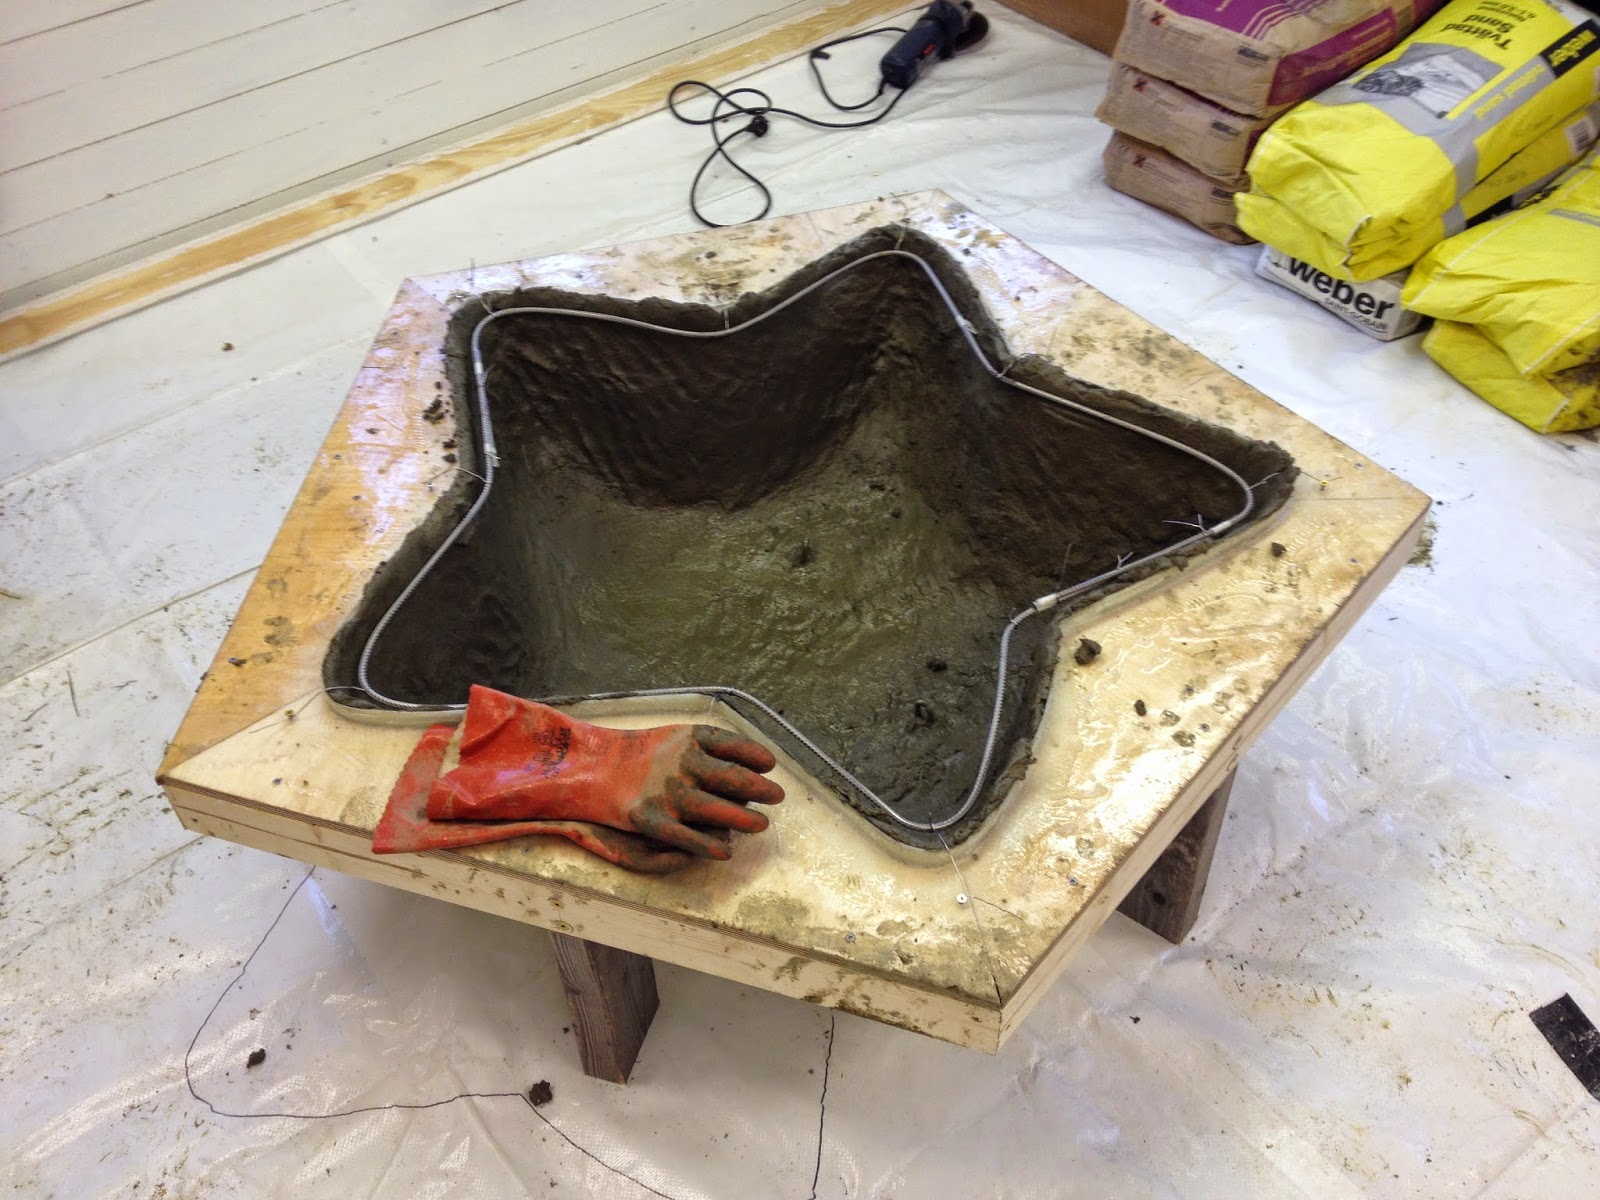
After making templates from cardboard I started to cut out the pieces for Spaceboy, new name, from 1 mm sheet metal. We folded the parts as we would have working in paper. Then we started to weld the pieces together. First with a spot welder and when everything was in its right place, we used a Mig/Mag welder.
First tryout in full size.

Yellow star.

 Ready to mix concrete for the yellow star. Top is Yellow Ochre pigment. Left is fibreglass and right is white cement to get an as bright yellow as possible. At first we experimented with readymade white concrete but failed so we had to start over again twice.
Lars mixing concrete, trying to add the exact amount of water necessary to create a workable mixture.
 Yellow layer done, starting to build layer two.


Revisiting black star.

No new posts in a long time. So I better recapitulate some parts of the process. 
Lars helped me building the concrete layers in the finished mould. We started with a pigmented layer. After that we put the stainless steel reenforcement in place went on with a layer of concrete without pigment. The concrete in both layer is mixed with fibreglass as a reinforcement.
Here we are almost done. Good to be able to work indoors. It's cold outside.
First layer complete and reenforcement in place.
The first finished star out of three. It's always exciting to turn the mould upside down, hoping everything has cured as it should.

Sunday, March 23, 2014

Framework.


I'm making a frame out of 12 mm beech plywood. It will make the mold sturdier and it won't flex when we start to pack the concrete.
Fixing the frame to the cured fiberglass mold using epoxy mixed with filler, then reinforcing on both sides with strips of fiberglass and epoxi resin.


Tuesday, March 18, 2014

Preparing the mold.

 After the mold had cured i used a jigsaw to saw of the excess fiberglass and resin.
 Feels like this actually might work.
 After some bending and prying i managed o lift the plug from the mold. The release agent worked well. Last time I made a mold like this that did not go so well.
This is the almost finished mould. To do now is some sanding and building a frame attached to the mold. The frame will make the mold more rigid which is necessary when working with concrete. The finished stars will be heavy, about, 75 kg and it will probably take some force to get the finished casts out of the mold so it must be strong.